Changing the partition size for a root partition or any other partition is just a little bit different when you’re working in the cloud. Today I’m going to show you how to change the root partition of an EC2 instance running Linux.
Resizing the root partition on an Amazon EC2 instance starts by stopping your instance.
First, go to volumes on the left-hand EC2 navigation control panel. Once you’re there, look under attachment information and identify the volume that is attached to the instance on which you want to change the root partition.
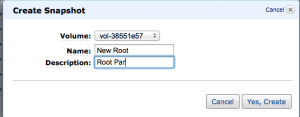
Right-click on the volume you want to resize and select Create Snapshot.
Fill out the details of the snapshot you’re creating. This will help you identify it in your snapshot inventory.
Select Snapshots on the left hand side of the EC2 control panel. From here you can see your snapshot being created. Make sure you remember what availability zone your running instance/server is in; what you do next will require that information
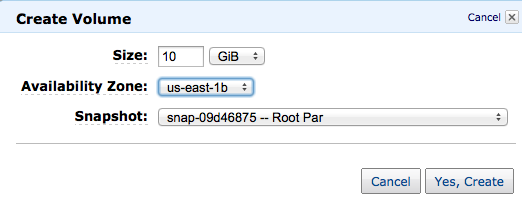
Right hand click on the snapshot you just created and select Create Volume from Snapshot.
Enter the new size you would like the partition to be, select the same availability zone of your running instance then click on yes, create.
Head back over to volumes in the EC2 control panel. Once there, select the root volume we just created an image of, right click on it, and select detach volume. We are doing this because now that we created a new 10gig volume, we are going to attach that new volume in place of the old volume.
Now right click on the new volume we created.
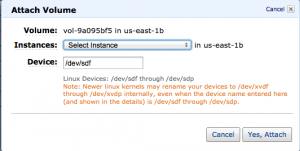
Attach the volume

It’s important to make sure the volume is attached as /dev/sda1, so change the volume name. If you do not do this, your instance will NOT be able to turn back on.
As soon as the volume is attached, go back to your instances and turn your instance back on.
Login to your instance and run df -m as sudo or root. You’ll notice that your partition size is still the same even though we created a larger volume. Now we need to resize the partition inside of Linux.
Make note of the partition name; in our case it’s /dev/xvda1. Now type resize2fs /dev/xvda1 at the command line.![]()
Now it starts to resize the root partition…
Once complete, type df -m to view the new root partition size and verify that it worked.
We see that /dev/xvda1 is now 10gig vs 1gig.
All Done!
Category:


